

The removal of your van's engine cover is kind of like opening the hood of a passenger car. Just pull the latch and pop open-no, wait. This is reality. Okay, I won't lie to you. It's such a pain that the first time I had to figure out how to do it I almost traded the Astro on a truck. But if you plan to ever do any work, you need to know how to do this, every bit as much as air intake removal. The best part is once you've done it a couple times it'll be second nature. Please forgive that such a basic procedure will be painfully detailed, for it is expected that some who reference may never have owned a van before. Please note, bolt sizes or types may vary between years--the van pictured is my 2003 Astro. The procedure can be broken down as follows:
Passenger Seat Removal (not completely necessary, but gives more work space)
Glove Box Assembly Removal
Rear Air Duct Removal (if equipped)
Engine Cover Removal
PASSENGER SEAT REMOVAL
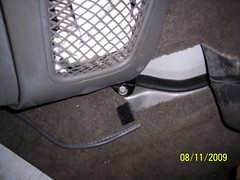
Start by removing the passenger seat. No, it isn't absolutely necessary, but it's only four nuts, and trust me you'll want the room. The bolts for the passenger seat are in each of the four corners. The nuts are 18 mm, as shown below. To remove them, you'll probably want a deep welled socket-3/8" drive seems to fit best.
![Image]()
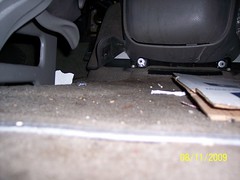
The pull the seat out. You'll be left with the seat belt connector, shown below-it's not bolted down anymore so just lift it straight off the bolt. And, you now have room to work.
![Image]()
Tip: As you can see, it's quite filthy under there. If your van looks anything like mine, do the same with the driver's seat and pull the rear seats as you normally do for hauling. Then you can blow the whole mess out with garage air. Anyway, back to the procedure.
Tip: Before sitting on the floor in there, you may wish to take a double layer of cardboard and lay that where the seat was-it helps keep the remaining ends of the bolts from gouging you.
GLOVE BOX ASSEMBLY REMOVAL
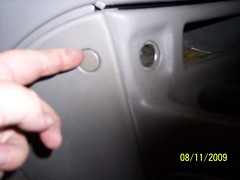
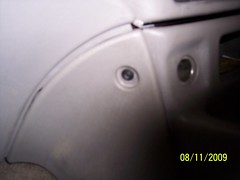
The next thing to come out is your glove box. That assembly is held in place by 2 torx screws, 2 bolts and 2 clips. Start by popping out the torx screw covers, revealing the torx screws-you may need a screwdriver instead of your fingernail, as shown. The torx screws are size 30.
![Image]()
![Image]()
Next pull the carpet as shown below-don't yank, it's only fastened lightly with Velcro on both sides of the glove box assembly.
![Image]()
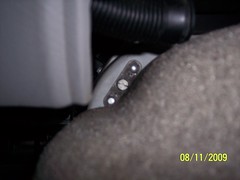
Now remove the 2 bottom bolts, shown below. They are 13mm bolts (below), and a socket extension will give you a lot more room to rachet.
![Image]()
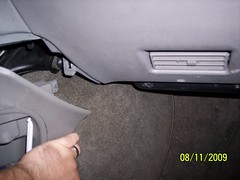
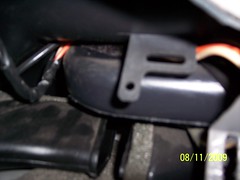
Now, with slowly increasing pressure-some force may be needed, but don't yank-pull each side of the glove box assembly out, as shown. NOTE: DO NOT REMOVE COMPLETE YET, THERE MAY BE A WIRING HARNESS THAT YOU COULD DAMAGE.
![Image]()
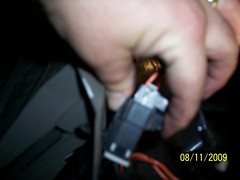
Now remove the wiring harness (if present) as shown below.
![Image]()
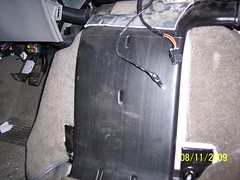
Pull the glove box assembly out. You're left with something like this:
![Image]()
REAR AIR DUCT REMOVAL if equipped
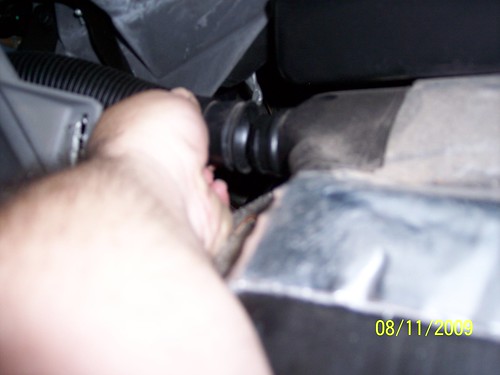
The rear air duct is connected at 3 points. They are easily pulled out. Try not to jerk or yank, as you could break plastic. Start by removing the hose on the top, driver's side as shown.
![Image]()
Next pull the duct toward the driver's side to detach it from the passenger side duct, as shown:
![Image]()
Now lift the duct up to detach from the bottom duct, and then set aside. You're finally ready to remove the engine cover.
ENGINGE COVER REMOVAL
The engine cover is attached by 2 bolts (top) and 2 brackets (bottom). Start by unbolting the top engine cover bolts. They are 15 mm bolts, located at the top of each side. You will need several socket extensions or one or two really long ones. They will not detach completely, so when they start clicking as you turn, your done with them.
![Image]()
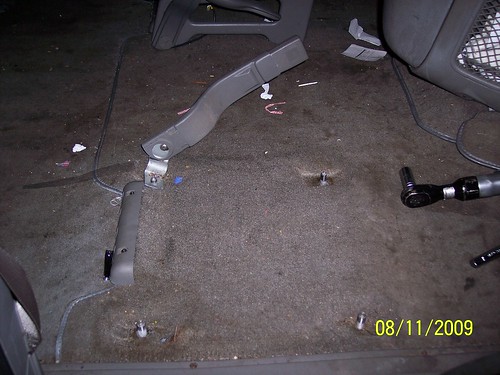
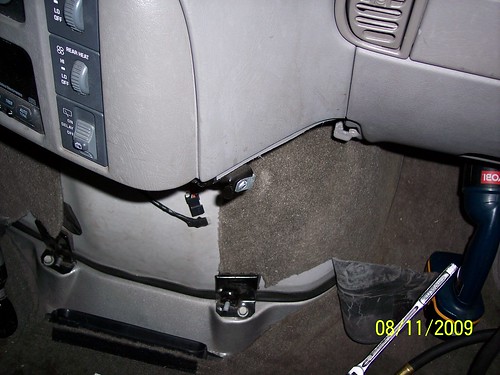
Next remove the bottom bracket bolts. They are 13 mm bolts, and once out the brackets simply lift out.
![Image]()
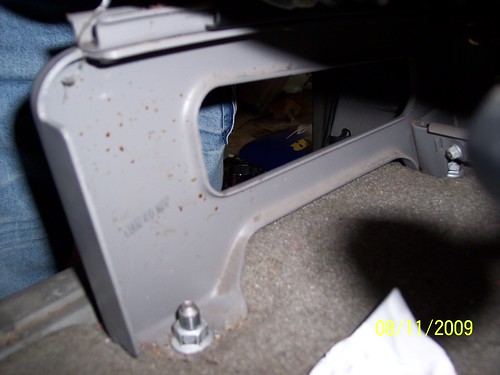
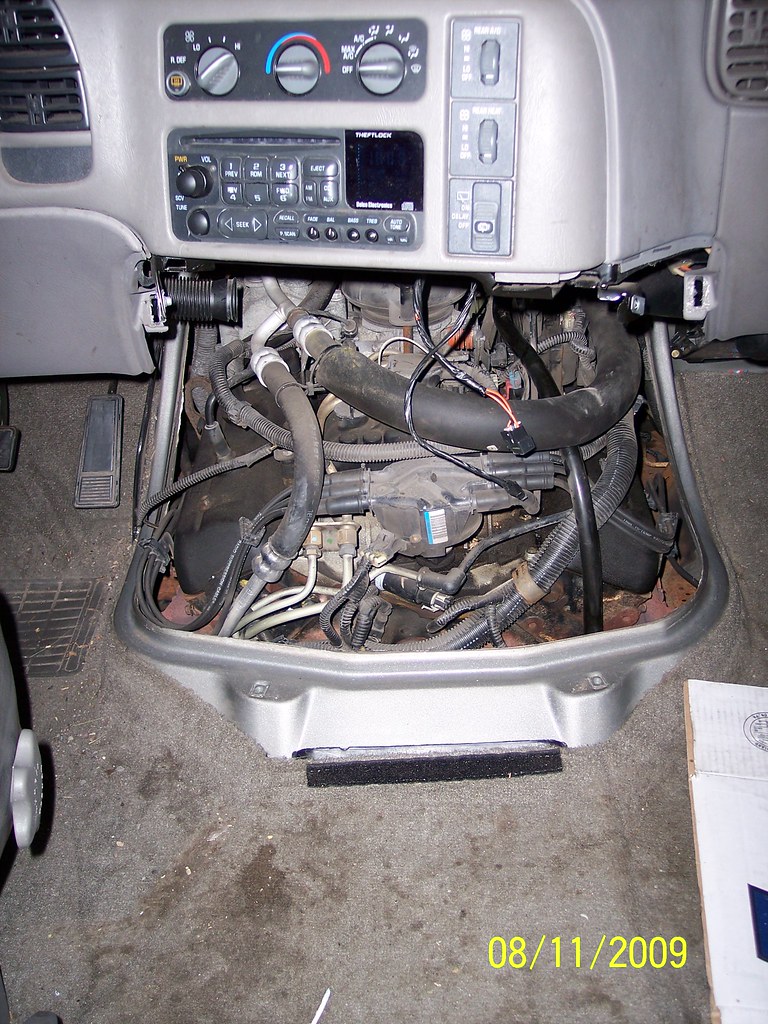
Now, pull out the engine cover. You may need to lift slightly and wiggle. If it's not moving, check the top bolts. Once out, set it aside. This is the end result:
![Image]()
Replacement is pretty much the reverse of what you just did.
TIP: When replacing the engine cover, do the top bolts first. It can be tricky to seat, especially at the top.
TIP: When replacing the engine cover, make sure the carpet goes behind the plastic by the gas pedal (late model vans). Failure to do this will make seating the cover engine cover properly next to impossible.
Passenger Seat Removal (not completely necessary, but gives more work space)
Glove Box Assembly Removal
Rear Air Duct Removal (if equipped)
Engine Cover Removal
PASSENGER SEAT REMOVAL
Start by removing the passenger seat. No, it isn't absolutely necessary, but it's only four nuts, and trust me you'll want the room. The bolts for the passenger seat are in each of the four corners. The nuts are 18 mm, as shown below. To remove them, you'll probably want a deep welled socket-3/8" drive seems to fit best.
The pull the seat out. You'll be left with the seat belt connector, shown below-it's not bolted down anymore so just lift it straight off the bolt. And, you now have room to work.
Tip: As you can see, it's quite filthy under there. If your van looks anything like mine, do the same with the driver's seat and pull the rear seats as you normally do for hauling. Then you can blow the whole mess out with garage air. Anyway, back to the procedure.
Tip: Before sitting on the floor in there, you may wish to take a double layer of cardboard and lay that where the seat was-it helps keep the remaining ends of the bolts from gouging you.
GLOVE BOX ASSEMBLY REMOVAL
The next thing to come out is your glove box. That assembly is held in place by 2 torx screws, 2 bolts and 2 clips. Start by popping out the torx screw covers, revealing the torx screws-you may need a screwdriver instead of your fingernail, as shown. The torx screws are size 30.
Next pull the carpet as shown below-don't yank, it's only fastened lightly with Velcro on both sides of the glove box assembly.
Now remove the 2 bottom bolts, shown below. They are 13mm bolts (below), and a socket extension will give you a lot more room to rachet.
Now, with slowly increasing pressure-some force may be needed, but don't yank-pull each side of the glove box assembly out, as shown. NOTE: DO NOT REMOVE COMPLETE YET, THERE MAY BE A WIRING HARNESS THAT YOU COULD DAMAGE.
Now remove the wiring harness (if present) as shown below.
Pull the glove box assembly out. You're left with something like this:
REAR AIR DUCT REMOVAL if equipped
The rear air duct is connected at 3 points. They are easily pulled out. Try not to jerk or yank, as you could break plastic. Start by removing the hose on the top, driver's side as shown.
Next pull the duct toward the driver's side to detach it from the passenger side duct, as shown:
Now lift the duct up to detach from the bottom duct, and then set aside. You're finally ready to remove the engine cover.
ENGINGE COVER REMOVAL
The engine cover is attached by 2 bolts (top) and 2 brackets (bottom). Start by unbolting the top engine cover bolts. They are 15 mm bolts, located at the top of each side. You will need several socket extensions or one or two really long ones. They will not detach completely, so when they start clicking as you turn, your done with them.
Next remove the bottom bracket bolts. They are 13 mm bolts, and once out the brackets simply lift out.
Now, pull out the engine cover. You may need to lift slightly and wiggle. If it's not moving, check the top bolts. Once out, set it aside. This is the end result:
Replacement is pretty much the reverse of what you just did.
TIP: When replacing the engine cover, do the top bolts first. It can be tricky to seat, especially at the top.
TIP: When replacing the engine cover, make sure the carpet goes behind the plastic by the gas pedal (late model vans). Failure to do this will make seating the cover engine cover properly next to impossible.
")


